Creating Users
Creating New Users
Learn how to add new users to your Leviathan PCRMS system. This guide covers the complete user creation process from the “New User” form.
Overview
The “Create New User” feature allows administrators to add new team members to the system. The form is organized into three tabs: GENERAL, GROUPS, and ID CARDS.
Accessing the New User Form
- Navigate to HR → User Dashboard
- Click the “CREATE NEW USER” button (gold button in top right)
- The New User form will open
User Creation Form
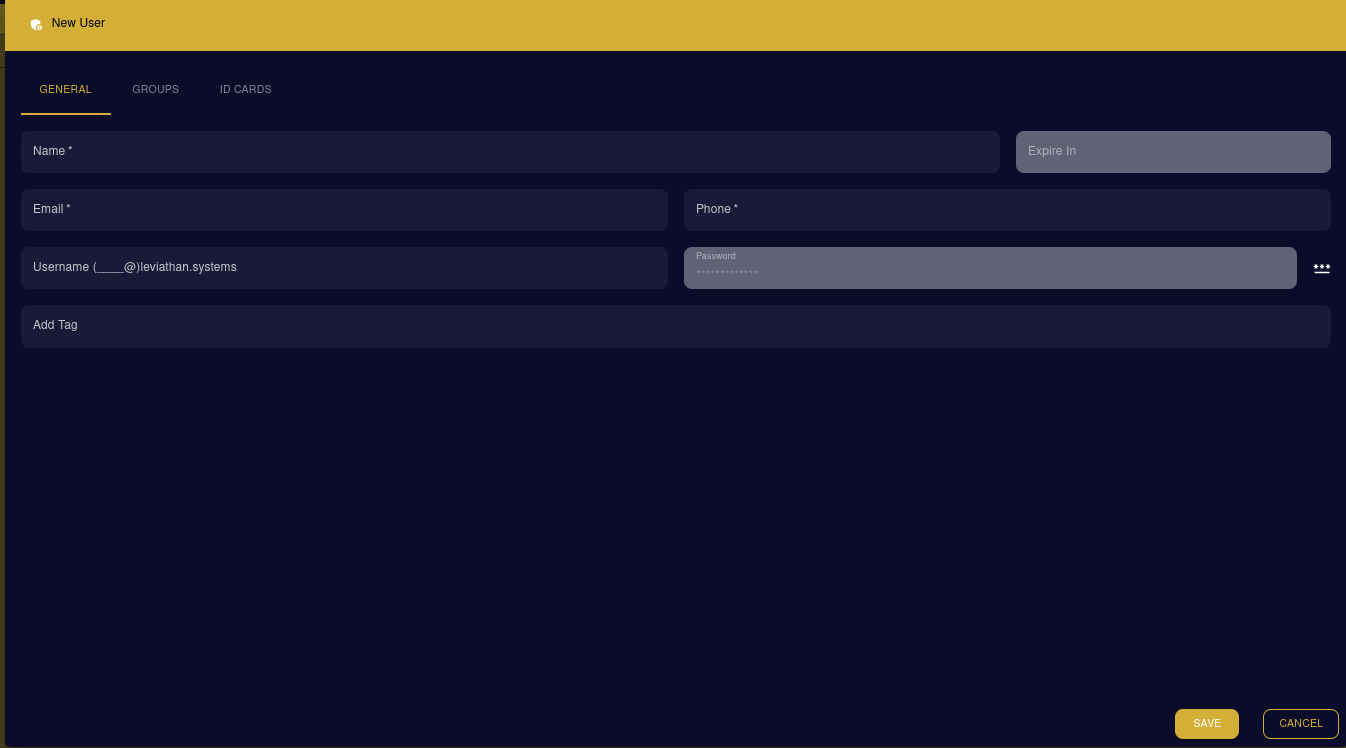
General Tab
The General tab contains the essential information for creating a new user account.
Required Fields
| Field | Description | Required |
|---|---|---|
| Name | Full name of the user | ✓ Yes |
| User’s email address (used for notifications) | ✓ Yes | |
| Username | Login username (format: username@leviathan.systems) | ✓ Yes |
Optional Fields
| Field | Description | Required |
|---|---|---|
| Phone | Contact phone number | No |
| Password | Initial password for the user account | No |
| Expire In | Set an expiration date for the account (if needed) | No |
| Add Tag | Assign tags/roles to the user (e.g., “active”, “manager”, “cleaner”) | No |
Username Format
The username field automatically appends @leviathan.systems to the username you enter. For example:
- If you enter:
testCleaner1 - The full username becomes:
testCleaner1@leviathan.systems
Password Field
- The password field includes a password generator button (three dots icon) on the right
- Click the dots to generate a secure random password
- The password is masked by default for security
Tags System
Tags help organize and categorize users by role or status:
- Active - User account is currently active
- Manager - Managerial role
- Cleaner - Cleaning staff role
- Maintenance - Maintenance staff
- Custom tags can be added as needed
To add a tag:
- Type the tag name in the “Add Tag” field
- Press Enter or click to add
- Tags will appear as removable chips below the field
Additional Tabs
Groups Tab
Assign users to organizational groups or departments for easier management and access control.
ID Cards Tab
Manage digital or physical ID card information for the user.
Completing User Creation
Save the User
- Fill in all required fields (Name, Email, Username)
- Optionally add Phone, Password, Tags, and Expiration date
- Click the “SAVE” button (gold button at bottom right)
- The user will be created and added to the system
Cancel Creation
- Click the “CANCEL” button to discard changes and close the form
- Any unsaved information will be lost
Step-by-Step Example
Let’s create a new cleaner user:
- Click “CREATE NEW USER”
- Enter Name:
John Doe - Enter Email:
john.doe@company.com - Enter Phone:
555-1234(optional) - Create Username: Type
johndoe(becomesjohndoe@leviathan.systems) - Set Password: Click the password generator or enter manually
- Add Tag: Type
cleanerand press Enter - Add Tag: Type
activeand press Enter - Click “SAVE”
Best Practices
Tip
Strong Passwords: Always use the password generator to create secure passwords for new users. Share passwords securely through encrypted channels.
Info
Username Convention: Establish a consistent username format for your organization (e.g., first.last, firstlast, employee_id).
Tip
Required Tags: Consider making certain tags mandatory for all users, such as “active” to indicate the account status.
Warning
Account Expiration: Use the “Expire In” field for temporary accounts (contractors, interns) to ensure automatic deactivation.
Common Use Cases
Creating a Cleaner Account
- Name: Employee’s full name
- Email: Work email
- Username: Short identifier
- Tags:
cleaner,active - Password: Auto-generate
Creating a Manager Account
- Name: Manager’s full name
- Email: Work email
- Username: Professional identifier
- Tags:
manager,active,supervisor - Groups: Add to management group
- Password: Auto-generate
Creating a Temporary Account
- Name: Contractor name
- Email: Contact email
- Username: Temp identifier
- Tags:
contractor,active,temporary - Expire In: Set end date
- Password: Auto-generate
After Creating a User
Once a user is created:
- Communicate Credentials - Securely share the username and password with the new user
- Verify Access - Ask the user to log in and confirm access
- Assign Permissions - Configure additional permissions in the Groups or Settings tabs
- Review Dashboard - The new user should appear in the User Dashboard
Troubleshooting
Username Already Exists
- Try a different username variation
- Check if the user already exists in the system
Email Format Error
- Ensure email follows standard format:
name@domain.com
Cannot Save User
- Verify all required fields are filled
- Check for error messages at the top of the form
Next Steps
- Managing Users - Edit and update existing user information
- User Permissions - Configure user roles and access levels
- User Dashboard - View and search all users