Managing Users
Managing and Editing Users
Learn how to edit and update existing user information in Leviathan PCRMS. This guide covers the complete user editing process.
Overview
The Edit User feature allows administrators to modify existing user accounts, update contact information, change passwords, manage tags, and adjust account settings.
Accessing the Edit User Form
From the User Dashboard
- Navigate to HR → User Dashboard
- Locate the user you want to edit
- Click the Edit button (pencil icon) in the Actions column
- The Edit User form will open
Edit User Form
The form is organized into three tabs: GENERAL, GROUPS, and ID CARDS.
General Tab
The General tab displays all the basic user information that can be edited.

Editable Fields
| Field | Description | Can Edit |
|---|---|---|
| Name | User’s full name | ✓ Yes |
| User’s email address | ✓ Yes | |
| Phone | Contact phone number | ✓ Yes |
| Username | Login username (format: username@leviathan.systems) | ✓ Yes |
| Password | User’s password (can be changed) | ✓ Yes |
| Expire In | Account expiration date | ✓ Yes |
| Tags | User roles and status tags | ✓ Yes |
Example: Editing testCleaner User
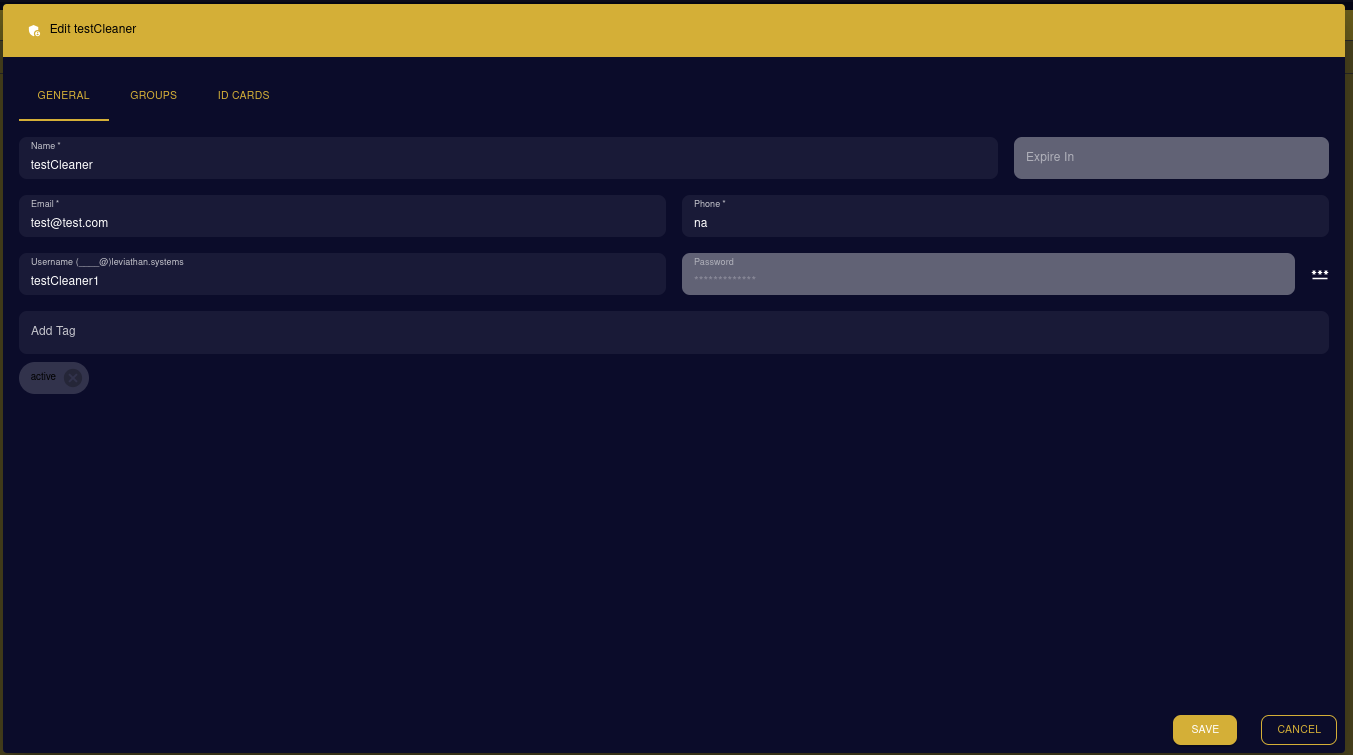
From the screenshot, we can see the user “testCleaner” being edited:
- Name: testCleaner
- Email: test@test.com
- Phone: na
- Username: testCleaner1@leviathan.systems
- Password: (hidden for security)
- Tags: active
Updating User Information
Changing User Name
- Click in the Name field
- Update the name
- Click SAVE to apply changes
Updating Contact Information
- Email: Enter new email address
- Phone: Update phone number (or enter “na” if not applicable)
- Click SAVE
Changing Password
- Click in the Password field
- Option 1: Type a new password manually
- Option 2: Click the password generator button (three dots icon) to create a secure password
- The new password will be masked (shown as dots)
- Click SAVE
Warning
Password Changes: When you change a user’s password, they will need to log in with the new credentials. Make sure to communicate the new password securely.
Modifying Username
- The username format is fixed as
[username]@leviathan.systems - Edit the part before the @ symbol
- The domain remains constant
Managing Tags
Adding Tags
- Type the tag name in the Add Tag field
- Press Enter or click to add
- The tag appears as a chip below the field
Removing Tags
- Each tag has an X button
- Click the X to remove a tag
- For example, the “active” tag can be removed if the user becomes inactive
Common Tags
- active - User account is currently active
- inactive - User account is disabled
- manager - Managerial role
- cleaner - Cleaning staff
- maintenance - Maintenance staff
- admin - Administrator privileges
Setting Account Expiration
- Click the Expire In field
- Select a date when the account should expire
- Leave blank for no expiration
- Useful for temporary workers, contractors, or interns
Additional Tabs
Groups Tab
- Assign or remove users from groups
- Groups help organize users by department or function
- Useful for access control and permissions
ID Cards Tab
- Manage digital or physical ID card information
- Update card access permissions
- Track card issuance and returns
Saving Changes
Save Your Edits
- Make all necessary changes in the form
- Click the “SAVE” button (gold button at bottom right)
- Changes will be applied immediately
- The form will close and return to the User Dashboard
Cancel Editing
- Click the “CANCEL” button to discard all changes
- The form will close without saving
- All modifications will be lost
Common Editing Tasks
Deactivating a User
When an employee leaves:
- Open the user’s edit form
- Remove the “active” tag
- Add an “inactive” tag
- Optionally: Set an expiration date
- Click SAVE
Tip
Don’t Delete: Instead of deleting users, deactivate them by removing the “active” tag. This preserves historical data and activity logs.
Resetting a User’s Password
When a user forgets their password:
- Open the user’s edit form
- Click the password field
- Click the password generator (three dots)
- Copy the generated password
- Click SAVE
- Securely communicate the new password to the user
Updating User Role
To change a user’s role:
- Open the user’s edit form
- Remove old role tag (e.g., “cleaner”)
- Add new role tag (e.g., “manager”)
- Update Groups tab if needed
- Click SAVE
Converting Temporary to Permanent User
For contractors becoming employees:
- Open the user’s edit form
- Clear the “Expire In” date
- Remove “contractor” or “temporary” tags
- Add “active” and appropriate role tags
- Update email to company email if needed
- Click SAVE
Bulk Editing
For editing multiple users:
- Edit users one at a time using the process above
- Use consistent tags across similar roles
- Consider creating a standard checklist for user updates
Best Practices
Tip
Regular Audits: Periodically review user accounts to ensure information is up-to-date and inactive users are properly tagged.
Info
Tag Consistency: Maintain a standardized list of tags across your organization for easier filtering and management.
Warning
Email Changes: Changing a user’s email may affect notifications and password reset functionality. Verify the new email is correct before saving.
Troubleshooting
Changes Not Saving
- Ensure all required fields are filled
- Check for error messages
- Verify you have permission to edit users
Username Already Exists
- Choose a different username
- Check if another user has the same username
Cannot Remove Tag
- Some tags may be system-required
- Try refreshing the page and trying again
After Editing a User
Once changes are saved:
- Verify Changes - Check the User Dashboard to confirm updates
- Notify User - If you changed login credentials, inform the user
- Test Access - For role changes, verify the user has appropriate permissions
- Document Changes - Keep a log of significant user account modifications
Next Steps
- User Dashboard - Return to view all users
- Creating Users - Add new users to the system
- User Permissions - Configure detailed access controls